

Professional CNC Press Brake Essentials Every Metal Fabricator Should Know
2026-09-21
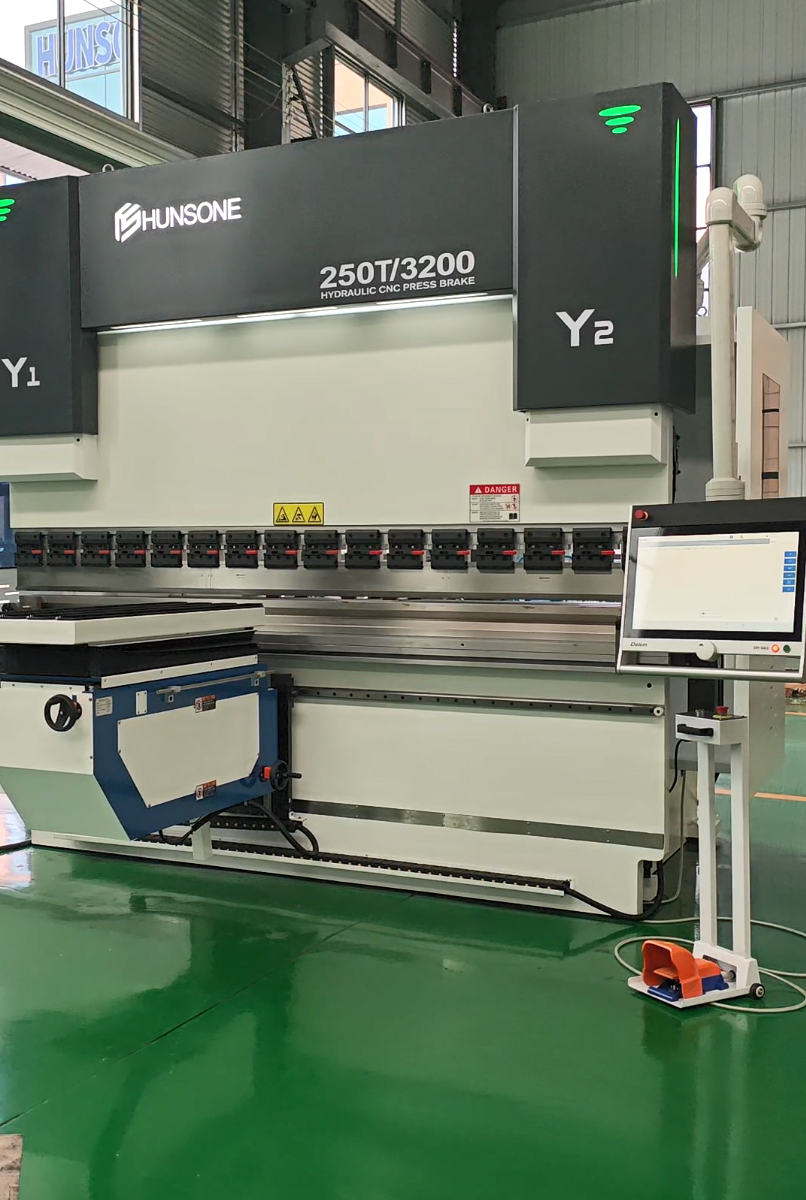
Ask ten fabricators what matters most in a press brake, and you'll get ten different answers—but the shops that consistently deliver precision bends all share a common thread: they've mastered the professional essentials that go beyond the operator's manual. From selecting the right tooling and calculating bend allowances to optimizing backgauge speed and maintaining hydraulic systems, the difference between a profitable job and a scrap bin often comes down to overlooked details. This guide cuts through the noise and focuses on what actually moves the needle in a production environment. Whether you're running a high-volume shop or tackling complex prototypes, understanding these fundamentals—and partnering with equipment suppliers like HUNSONE who live and breathe press brake technology—can give you a measurable edge.
Choosing Punches and Dies That Don't Fight Your Bend Radius
When a punch nose radius is too sharp for the material thickness or tensile strength, the metal can crack or develop micro-fractures along the bend line. This often gets blamed on poor material quality, but the real culprit is a tool that forces the inside radius to form under extreme localized stress. A better approach is to match the punch radius to the natural bend radius the material wants to achieve. That natural radius depends on the die opening, material type, and thickness — not on how hard you force the tooling into the sheet.
Die selection plays an equally important role. A narrow V-opening can create a smaller inside radius than intended, while a wider opening lets the material relax into a larger, more stable bend. Many shops default to an 8x material thickness die opening, which works for general work but can still fight the bend if the punch radius is mismatched. Pay attention to the ratio between punch radius and die opening; if the punch radius is significantly smaller than what the die would naturally produce, the metal has to stretch more than necessary, raising the chance of cracking and springback variation.
Instead of forcing a fixed radius, consider using punches with slightly larger radii for difficult materials or thicker gauges. You can also step up to a wider die opening to reduce the tonnage and let the material find its own radius more easily. Testing with a small sample before committing to a full production run can reveal whether your chosen combination fights the bend or works with it. The goal isn't just to hit a print dimension; it's to create a bend that stays stable through repeated hits without tearing or thinning the outside surface.
Springback Compensation Based on Real Material Numbers
Relying on datasheet values for springback compensation often hides the real variation that arrives with each steel coil. When the die face is adjusted from actual measured material numbers—yield strength, hardening exponent, r-values—the compensation shifts from a rough estimate to a targeted correction. The simulation receives the same mechanical properties that the incoming blank will carry into the press, so the predicted springback has a direct link to production reality.
This becomes especially visible in high-strength steel parts, where a difference of 20 MPa in yield stress can change the final angle enough to miss tolerance. By pulling real material numbers from tensile tests and mapping them to coil or heat identifiers, the compensation routine can be updated before the blank is even cut. It turns springback adjustment from a fixed die geometry decision into a per-coil adaptive process.
On the shop floor, that usually means storing measured flow curves in the forming simulation database and letting the die design or shimming logic call up the matching material card. The outcome is less trial-and-error tryout, fewer unexpected dimensional issues after a material change, and a compensation strategy that remains accurate as the supply chain delivers different batches.
Backgauge Reference Points You Should Recheck Every Shift
Before the first bend hits the die, take ninety seconds to walk the backgauge through its full travel. Watch for hesitation near the ends and listen for any change in motor pitch. A sticky way cover or a chip caught in the ballscrew will shift your reference by a few thousandths without throwing an alarm, and that is enough to scrap a full nest of blanks by the afternoon.
After homing, touch off a known flat edge and compare the displayed position to the physical measurement. If you have a machined setup bar or a gauge block, use that instead of a bent part from the previous run. Write the offset on the control if needed, but do not just trust the stored value from yesterday's shutdown; thermal growth and morning coolant temperatures change where the fingers actually sit.
Finally, recheck the two outer fingers against the centerline of the punch before locking in your program. Run the backgauge forward with a test strip, then measure from the bend line to the back edge in three places. If the left and right stops are not parallel to the die, adjust them now. This is easier than discovering the taper on a finished batch after the shear has already cut your next order.
Sequencing Bends So the Part Never Hits the Upper Beam
Getting the bend order wrong is a fast way to watch a finished flange slam into the upper beam. You might have the geometry right on the flat pattern, but once a side is bent up, it becomes an obstacle for the ram on the next hit. Before you even set up the tooling, walk through each bend in your head—imagine the part rotating and being repositioned after every stroke. If any already-formed edge would cross into the punch or upper beam path, move that bend later in the sequence or approach it from the opposite side.
A practical trick is to treat the tallest flanges as the final moves, not the first ones. When a tall side is bent early, it swings upward and can easily catch the beam during subsequent bends on the other edges. Sometimes the fix is as simple as flipping the part over between hits, but that only works if the backgauge still locates reliably. For box-shaped parts or deep channels, consider bending the short interior flanges first, then the outer long ones—this keeps the part low and wide for as long as possible. If you have a press brake with programmable ram tilt or a taller die holder, you may also buy yourself extra clearance without changing the sequence.
Even with a planned order, always check the dynamic path, not just the static final shape. The sheet can flex upward slightly as the punch contacts, and the operator’s hands may lift the edge during positioning. If you don’t have simulation software, use a cardboard or scrap strip mock-up to test the collision points at each stage. During the first real part run, slow the ram speed and watch the gap between the part and the upper beam at every bend. Adjusting the order after seeing that near-miss is far cheaper than repairing a cracked beam or a bent tool holder.
The Cheap Maintenance Habits That Preserve Ram Parallelism
Most people only think about memory when a stick dies or the system starts crawling. Yet dual-channel and quad-channel setups quietly lose parallelism through a handful of everyday oversights. Swapping in a mismatched module—same capacity but different rank count or chip density—can force the memory controller to drop back to single-channel or flex mode. Matching sticks by part number, batch, and even PCB revision costs nothing extra if you plan the upgrade before buying.
Dust and oxidation are cheaper to fix than most assume. Removing each DIMM every year or so, brushing the slots with a dry anti-static brush, and wiping the gold contacts with a clean pencil eraser restores signal integrity that is often degraded by film buildup. Re-seating modules firmly until both latches click also corrects slightly tilted sticks that can intermittently break channel pairing. These are five-minute jobs that require no special tools.
One more habit that pays off: resist the urge to chase aggressive memory overclocks on budget boards. Unstable training sequences can leave the system running with one channel disabled after a failed POST, and many users never notice the drop. A quick check in a tool like CPU-Z or HWiNFO after any hardware change confirms whether the memory is still in dual- or quad-channel mode. Keeping the BIOS/UEFI updated also helps the board re-train memory more reliably after power loss or component swaps.
Tooling Changes That Cut Setup Time Without Losing Accuracy
Reducing setup time often feels like a trade-off against precision, but the right tooling changes can actually deliver both. Start by replacing manual edge finders with a touch probe—it eliminates the slow process of tapping a part to locate edges and instead captures positions in seconds, while consistently hitting tolerances within a few tenths. Pair it with a tool setter that automates length and diameter measurement, so you stop wasting minutes adjusting offsets by hand and start trusting the numbers on the first cut.
Quick-change workholding is another quiet win. Swap out traditional clamps for a zero-point mounting system, and you can stage fixtures offline while the machine keeps running. The repeatability of these systems means your datum doesn’t drift when switching between jobs, so accuracy stays locked in without needing to re-indicate every part. On the tooling side, modular boring heads with preset cartridges let you dial in fine adjustments without breaking down the entire assembly—tightening or loosening a screw on a pre-calibrated insert saves real minutes over conventional boring bars.
Finally, standardize your tool library with dedicated holders for each job, preset offline using a height gauge. This simple habit removes the guesswork from tool length offsets and cuts tool change time dramatically. When everything is measured and logged before it goes into the spindle, you avoid the mid-run surprise of a tool being 0.002 inches off. The result is a setup process that feels less like tuning an instrument and more like clicking a cartridge into place—fast, repeatable, and accurate where it matters.
FAQ
A CNC press brake brings repeatable backgauge positioning, automatic angle correction, and stored bend programs to the floor. Instead of relying on an operator to manually set stops and watch the bend, the controller handles sequencing, ram depth, and often real-time angle feedback. That means less trial-and-error, fewer scrapped parts, and the ability to switch between complex jobs without redoing the setup from scratch.
Material thickness, tensile strength, bend length, V-die opening, required angle, and springback compensation all matter. But in practice, the V-die opening often drives everything else: go too wide and you lose tonnage and accuracy, go too narrow and you risk cracking or overloading the tooling. Also pay attention to bend radius and flange length, since they limit how the part can sit in the die.
A common starting point is eight times the material thickness, but that can shift from six to twelve times depending on the inside radius you need and the tonnage available. If the flange is short, you may need a smaller V opening so the part doesn't fall into the die. Always check the press brake's tonnage chart for the specific material and bend length before committing.
Ignoring springback and then over-bending to compensate by feel, programming an impossible bend sequence that makes the part collide with the ram or backgauge, and forgetting that material grain direction changes the bend behavior. Another one is not accounting for material thickness variation from the supplier, which can throw off the angle even if the program is technically correct.
If the punch and die aren't centered and parallel along the whole length, you get inconsistent angles from one side of the part to the other, uneven tool wear, and extra stress on the ram guides. Over time, that misalignment can damage the machine's frame or lead to hydraulic issues. A quick alignment check before each job saves a lot of rework.
Clean the tooling and bed daily, wipe down the backgauge rails, and check for metal chips that can scratch the dies. Weekly, inspect hydraulic oil level and look for leaks at fittings. Monthly, replace or clean filters, verify backgauge calibration with a known reference, and confirm the angle sensor reads correctly. Don't ignore slight drift in the ram—it usually means air in the system or a worn valve.
Bending too fast can cause cracking in hard materials, leave marks on soft sheet, or create inconsistent angles because the controller can't react to real-time feedback. Bending too slowly wastes cycle time and may lead to excessive heat buildup in the hydraulic system. Most CNC press brakes let you set approach speed, bending speed, and return speed separately; tune them to the material thickness and die opening.
Springback depends on the material's yield strength and elastic modulus—high-strength steel springs back more than mild steel, and aluminum behaves differently from stainless at the same thickness. You can measure it with a test bend, then program an over-bend angle, or use an angle sensor that measures the part in real time and tells the ram to stop when the correct loaded angle is reached. Some controllers also store springback values per material grade for future jobs.
Conclusion
Getting the bend radius right starts before the first hit. Too many shops pick a punch and die based on what's already in the cabinet rather than what the material actually wants. A narrow V-opening on thick plate might give you a crisp inside radius, but it also spikes tonnage and wears the tooling unevenly. Pair that with springback numbers pulled from a generic chart instead of your own test bends, and you'll chase the angle all morning. Real material numbers matter because even two coils of the same spec can behave differently. Equally important is the backgauge reference point. If the operator zeroes it against a rough edge from the shear, every bend after that inherits the error. Checking the gauge fingers against a known flat surface at shift start takes thirty seconds and keeps a whole run from drifting out of tolerance.
Bend sequencing is often treated as an afterthought, but a part that collides with the upper beam mid-cycle wastes more time than any setup shortcut saves. Think through the order so the flanges fold away from the ram, not into it. On the maintenance side, ram parallelism doesn't need expensive laser checks. Simple habits reveal most problems before they become crashes: cleaning the gibs, keeping the hydraulic oil topped up, and cycling the ram through its full stroke before each job. Tooling changes are another place where small improvements add up. Instead of swapping punches and dies piece by piece, stage the next setup on a cart with matched heights already measured. That cuts the trial bend count and keeps the first-off part closer to print.
Contact Us
Contact Person: James Chen
Email: [email protected]
Tel/WhatsApp: 86 13770803946
Website: https://www.hunsone.com/